
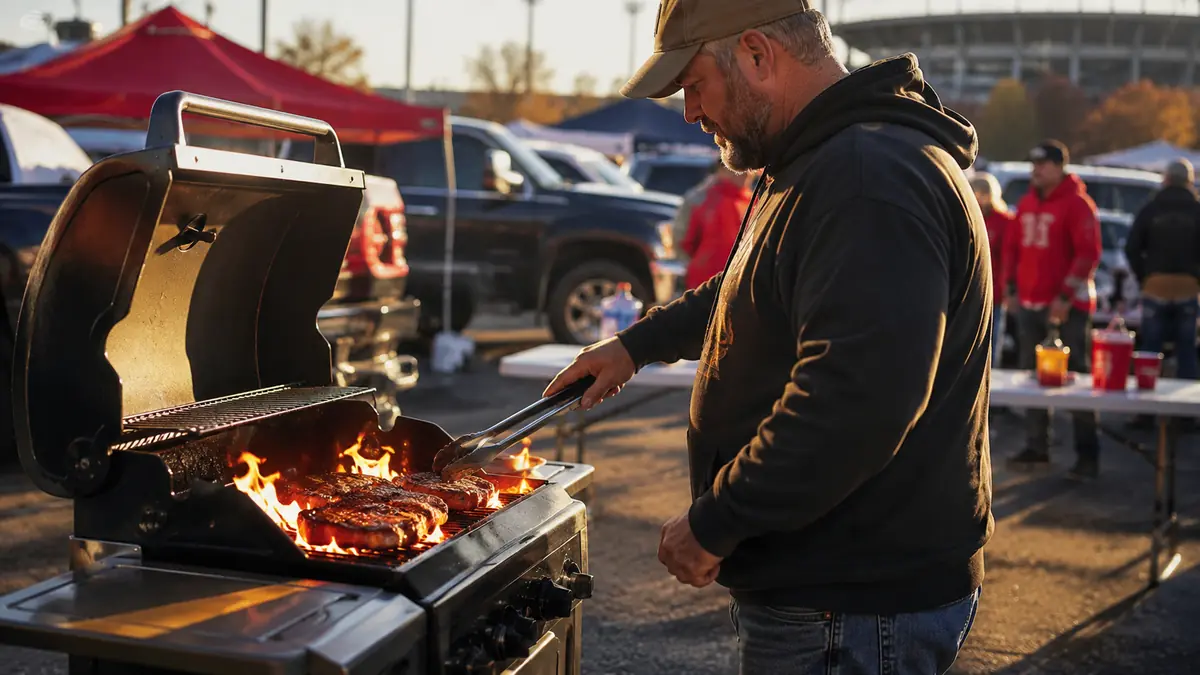
Every tailgate I have ever set up near a stadium lot follows the same arc if the grill isn't right: someone shows up starving forty-five minutes before kickoff, the propane grill takes twenty minutes just to get hot, and by the time the burgers are close the parking lot around you has already eaten without you. Eleven seasons of backyard cooking taught me the fix is not a bigger grill, it's a plan you build the night before, plus a grill built to go from cold metal to a stable 400 degrees fast enough that you're not apologizing for lunch at 11:30 for a noon game. This is the exact sequence I run, step by step, using a Coleman RoadTrip 285 as the tool that makes the timeline actually work in a parking lot instead of a backyard.
A tailgate is a different animal than a Sunday cookout on my 12 by 14 deck. There's no water spigot, no covered porch to duck under if it rains, a folding table instead of a countertop, and a crowd that shows up all at once instead of trickling in over three hours. Everything below assumes you're cooking from a parking spot or a gravel lot, not grass you can stake into. If you want the deeper case for why a portable propane grill beats a charcoal setup for this specific job, I laid out ten reasons in this piece, and my full long-term notes on this exact grill are here.
Get the burgers going before the parking lot fills in around you.
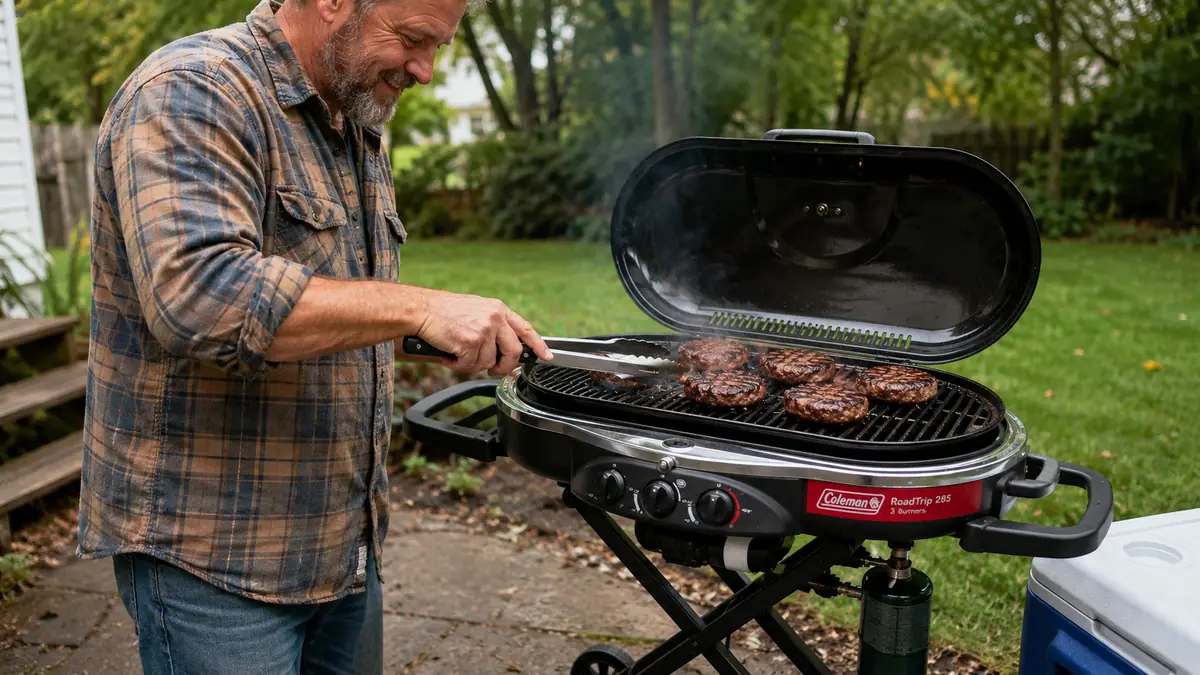
The Coleman RoadTrip 285 is the grill that makes the timeline in this guide realistic: three independent burners, InstaStart ignition, and a stand-up design that folds down to roll to your spot in one trip. Current price on Amazon, worth checking before kickoff.
Amazon Check Today's Price on Amazon →Step 1: Prep at Home the Night Before
The single biggest mistake I see at tailgates is treating grill day like a decision you make in the parking lot. The night before, I portion and season everything so the only job left on-site is cooking. Burger patties go into stacked wax-paper squares in one container, dogs stay in their original pack, and chicken thighs get trimmed and marinated in a gallon bag so they're ready to lay straight on the grate. I weigh out roughly six ounces per patty so a dozen burgers cook at the same rate side by side, because uneven patties are the number one reason half your burgers are done before the rest.
Pack the grill itself the night before too. I wipe the Coleman's cast iron grates with a thin coat of oil before it goes in the truck, check that both propane options I'm bringing are full, and test the InstaStart ignition on all three burners in the driveway so I'm not troubleshooting a dead igniter forty-five minutes before a parking lot fills in around me. A five-minute check at home beats a ten-minute problem in a lot with no tools.
Last thing before I load the truck: a cooler plan. Raw meat goes in one cooler packed to keep everything at or below 40 degrees Fahrenheit, ice on the bottom and sides, meat in the middle, a thermometer clipped to the lid so I can check it without opening it and losing cold air. Drinks and condiments go in a second, separate cooler. Cross-contamination from one cooler doing double duty is an easy mistake to avoid and a miserable one to make in front of a crowd.
Step 2: Do the Propane Math Before You Leave
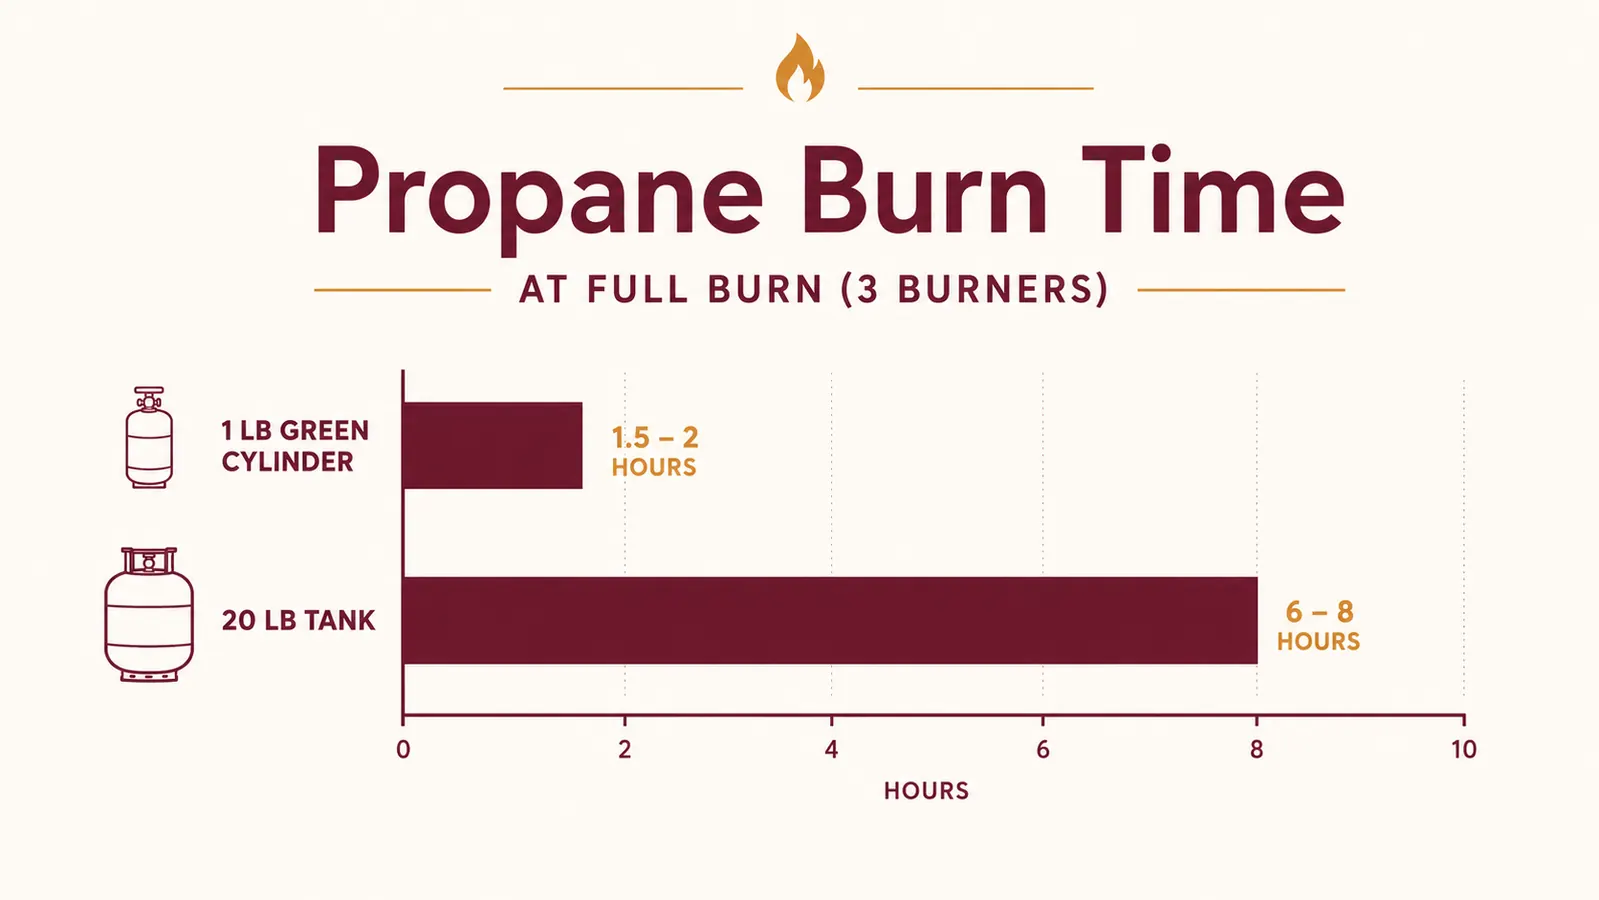
This is the step people skip and regret. The Coleman RoadTrip 285 runs on the small 16.4-ounce, one-pound green propane cylinders by default, and at full blast across all three burners it burns through one of those in roughly 90 minutes to 2 hours, depending on wind and whether you're also running a side burner. For a typical tailgate, preheat plus two to three hours of actual cooking and holding, I bring three of the small cylinders minimum, four if I'm also running a side burner for beans or queso.
The better option, and the one I actually use now, is the low-pressure hose adapter that lets the RoadTrip run off a standard 20-pound propane tank, the same size you'd use on a home gas grill. One 20-pound tank easily covers a full tailgate day, six to eight hours, with plenty of margin, and it works out cheaper per hour than buying a stack of small green cylinders every game. The tradeoff is the tank is bulkier to carry and stand next to the grill, so if you're walking a distance from your spot rather than parking right next to it, the small cylinders might still make more sense.
Either way, bring one more cylinder than you think you need. I have run out of propane exactly once, halfway through a batch of chicken thighs with a full parking lot watching, and I have never made that mistake twice since. A spare one-pound cylinder weighs about a pound and costs a few dollars. There's no version of this math where skipping it is worth the risk.
Step 3: Stage and Set Up in the Parking Lot
Find your spot and level it before you unfold anything. Pavement is usually flat enough on its own, but grass lots and gravel shoulders are not, and a portable propane grill on a slope pools grease toward one side and cooks unevenly. I carry two thin wood shims in the truck specifically for this, one under a leg if the RoadTrip is rocking even slightly. Thirty seconds with a shim beats an hour of babysitting a grill that won't sit still.
Set the grill up with its back to the wind if you can tell which way it's blowing, and give yourself at least three feet of clearance on all sides, away from the tailgate, away from folding chairs, away from anything that could tip into it. I keep my prep cooler on one side and an empty folding table on the other for finished food, so the flow only ever moves in one direction: raw goes in from the cooler side, cooked comes out onto the table side. That single habit has kept me from ever setting a cooked burger back down where a raw one just sat.
Light both grates and let the Coleman fully preheat, five to seven minutes with the lid down, before anything touches the grate. I know it's tempting to throw the first burgers on the second you see flame, but a grate that hasn't come up to temperature won't sear, it will steam, and you'll lose the crust that makes a tailgate burger worth eating standing up in a parking lot.
Step 4: Cook Order and Timing
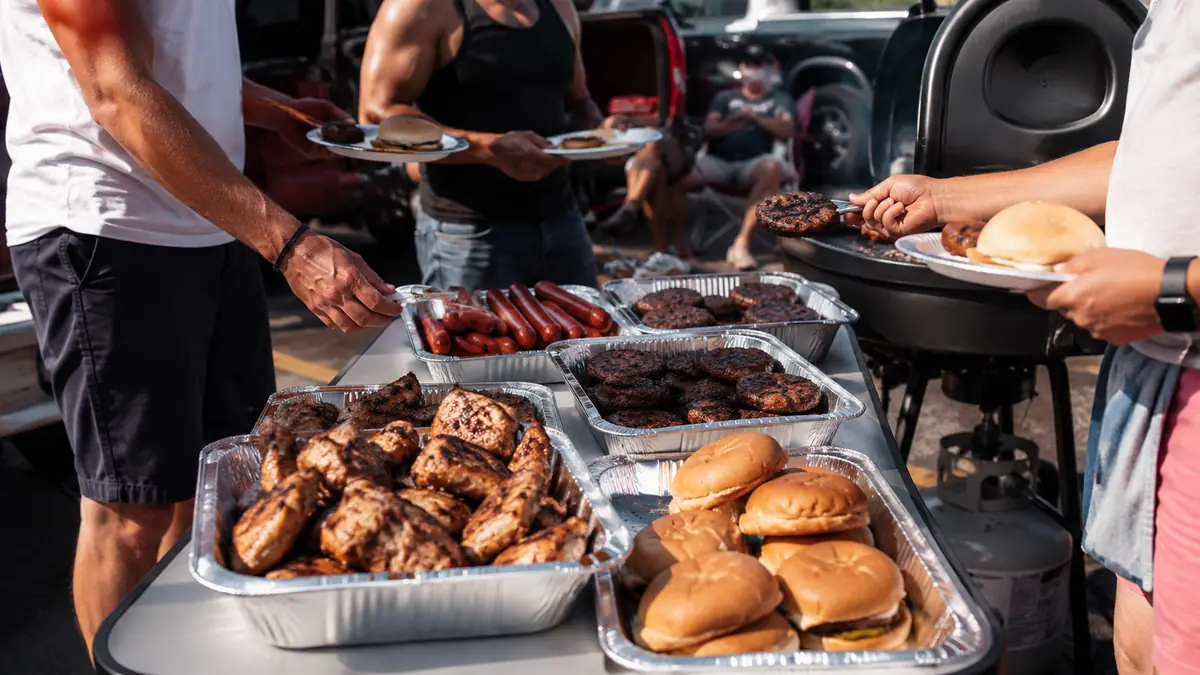
Cook in the order that respects both food safety and the crowd's patience. Chicken goes on first, since it needs the longest and the most margin for error: boneless thighs run about 6 to 7 minutes per side over medium-high heat on the RoadTrip, and I don't pull them until an instant-read thermometer hits 165 degrees Fahrenheit in the thickest part. Don't guess by color. A thermometer costs ten dollars and it is the difference between a normal tailgate and a bad story.
Dogs go on next, since they're mostly about heat and browning rather than real doneness risk, about 6 to 8 minutes total, turning every couple of minutes so they don't split. Burgers go on last, closest to serving time, because nobody wants a burger that's been resting under foil for twenty-five minutes. At medium-high on the Coleman, a six-ounce patty runs about 4 minutes a side for medium, and I pull at 160 degrees Fahrenheit internal for ground beef, no exceptions, since that's the food-safety line regardless of how pink the middle looks.
Stagger it so everything lands within about ten minutes of each other: chicken first onto one burner while the second burner heats the grate for dogs, dogs shift over while burgers go onto the freed-up space, and the whole spread comes off within a tight window instead of one item sitting cold while you finish the rest. The RoadTrip's independent burner control is what actually makes this staggering possible, since you can run one zone hotter for a quick sear while another holds a lower, steadier heat for the chicken.
Step 5: Wind Management and Safe Teardown
Parking lots funnel wind in ways backyards don't, between rows of trucks and RVs, and a gust can pull real heat off an open grate fast. If it's gusting, angle the Coleman so its windscreen panels take the brunt of it, and consider parking a truck tailgate or an open door as a partial break upwind. I've learned to just accept slightly longer cook times on a windy day rather than cranking every burner to max, which burns fuel fast without actually raising grate temperature much in a steady wind.
When it's time to break down, don't rush the hot metal. Turn off the burners at the tank or cylinder first, not just the grill's control knobs, so any gas left in the line burns off clean. Let the grates cool for at least ten minutes before you touch them or fold the unit, and never fold the legs while the grease tray still has hot fat in it, that's how you end up with a lap full of hot grease in a parking lot. I keep an old towel just for wiping the grates once they're warm but not scalding, then a second wipe with a fresh one once it's fully cool before it goes back in the truck.
Dump cooled grease into a sealed container, never onto the pavement, and do a walk-around for anything left behind, a cylinder, a shim, a stray fork, before you pull out. A five-minute teardown routine done the same way every time means you're never the truck holding up the exit line while someone digs through gear looking for a lighter.
What to Do When Something Goes Wrong
If a cylinder runs dry mid-cook, swap it fast rather than trying to nurse the last few burgers on a dying flame, weak gas pressure cooks unevenly and can actually take longer than a clean swap. This is exactly why the spare cylinder rule in Step 2 matters more than any other single tip in this guide.
If wind keeps knocking your temperature down no matter how you angle the grill, close the lid between flips instead of leaving it open, and shrink your cook zone, run everything on two burners at a slightly higher setting instead of spreading thin across three. A smaller, hotter zone holds up to wind better than a wide, moderate one.
If you truly can't find level pavement, shim under the legs rather than trying to compensate by tilting food around on the grate. A grill that's off level pools grease and oil toward the low side, which is both a flare-up risk and the reason one end of your food browns faster than the other.
Cold grates almost always trace back to skipping preheat. Give the grill its full five to seven minutes with the lid down before the first piece of food goes on, even if the crowd is hungry and staring at you. A minute of patience up front saves you from food that sticks, tears, and looks worse than it tastes.
When everyone shows up right at kickoff instead of trickling in, lean on the staggered cook order from Step 4 and keep a tray of something that doesn't need the grill, chips, cut fruit, cold cuts, so there's food on the table the moment people arrive even if the burgers need another six minutes. A tailgate with snacks on hand while the main cook finishes feels controlled instead of rushed.
What Else Helps
A couple of small additions make the whole system smoother. A second folding table doubles your staging area so raw and cooked never share a surface, an instant-read thermometer takes the guesswork out of every protein, and a roll of heavy-duty foil covers a finished tray in seconds if the wind is blowing grit around. None of that replaces having a propane grill that heats fast and holds steady, but it's what turns a good grill into a smooth morning for six to eight people or a whole tailgate row.
The grill that wins at a tailgate isn't the biggest one, it's the one that's hot and ready before the parking lot fills in around you.
Three burners, one trip from the truck, hot before the lot fills in.
This is the exact grill I run through the sequence above, tested across a full season of parking lot cooks. Current price on Amazon, worth checking before your next tailgate.
Amazon See the Coleman RoadTrip 285 on Amazon →